Why Your Drone Footage Is Grainy (And How to Fix it!)
TranscendFPV is a reader supported product and review site. Clicking on links to learn more, or buy products, may earn us money, and support our work. Learn more about the history of TranscendFPV and our passion on our About page.
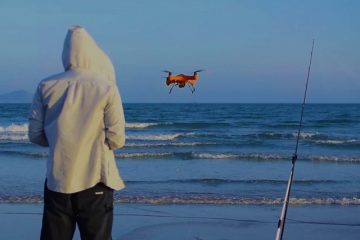
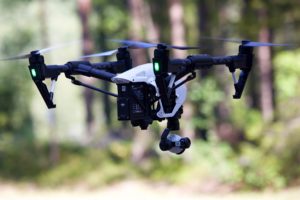
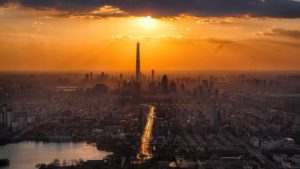
Taking photographs and videos while flying your drone is all part of the fun of flying a drone. The aerial shots produce footage from a new perspective that can be quite exhilarating! But what if the photographs and videos do not come out as clear and as good?
Why is your drone footage grainy? Your drone footage may be grainy because of the camera sensor size, the light conditions you are shooting in, automatic camera settings, compression settings for the files, or the use of digital zoom. These causes of grainy drone footage can be mitigated with simple adjustments to your flying or camera settings.
Understanding why your drone footage does not turn out as you expect will require you to delve into some photography principles to understand what is going on with the camera. Let’s dive right in!
Quick Links
What Causes Grainy Footage In The First Place
In photography terms, grainy footage is termed noise, so you may see these terms used interchangeably in information around this topic. Just be aware that they mean exactly the same thing.
There are several aspects of capturing drone footage that can contribute to the footage turning out grainy. We will explain some of the possible causes for this irritating issue and some possible fixes that you can use to remedy the problem.
Problems that can contribute to grainy drone footage include the following.
- A small camera sensor. Cameras on drones are small in comparison to other handheld cameras. This means that there is not a lot of room in the camera housing for a large sensor. Smaller sensors are less efficient in that they cannot gather the same amount of light for processing as a larger sensor can. As a result, the sensor will struggle to process images in low light or overcast conditions.
- Low light conditions. Low light times of day, such as dusk, or in conditions where the available natural light is reduced, such as on overcast days, will be a problem for the camera sensor.
- Automatic settings on the drone camera. There are settings on the drone camera that may be set to an automatic mode that tries to correct images. The internal automatic noise reduction setting is one such setting that can cause incorrect modifications to the footage resulting in a grainy outcome.
- Compression settings. The codec that the camera uses can leave compression artifacts in the footage. The compression codec is to minimize the amount of space that the footage takes up on the camera or the drone’s internal storage or SD card.
- Digital zoom. Zooming in too far on an object or scenery using the digital zoom function on the drone camera will, at some point in the zoom, start to pixelate and cause the footage to come out grainy.
How To Fix Grainy Drone Footage
Knowing what causes grainy footage on your drone’s camera is the first step; making adjustments to improve the footage quality is the next step.
Some of the causes for grainy footage are a limitation of the equipment itself, but there are a few ways you can compensate for these in the way you fly your drone to capture the required footage.
Small Drone Camera Sensor
While there is really not much you can do about the size of the camera sensor once you have your drone, if you are aware of the problem, you can opt for a different spec drone.
When you look for a drone to buy, check the technical specifications and choose one with a sensor that is as large as possible. This will give you the best quality light utilization and therefore increase the quality of the footage the camera is capable of recording.
Low Light Conditions
Flying and recording footage in low light conditions will be problematic for most drone cameras. The low light conditions that exist at dusk, just before sunrise, and in heavily overcast conditions will reduce the amount of light that the camera sensor is able to collect. This results in grainy footage and is probably the most common cause of this problem.
Fly your drone at the brightest possible times of the day to maximize the amount of light available for the camera sensor.
You can also adjust the ISO settings on the drone camera to try and compensate for the low light conditions, but this, in itself, can also result in grainy images.
Your drone camera will have an ISO range that it is capable of functioning within. The ISO value is also sometimes referred to as the ISO speed of the camera. The basic rule of thumb with ISO settings is that the lower the ISO number, the less light will hit the sensor and the darker the image will be. The higher the number, the greater the amount of light, and the image will be brighter.
You can compensate for low light by setting a higher ISO value on the camera, but there is a limit. If the amount of available light is too low and you set the ISO value too high, the images will appear grainy.
Automatic Noise Reduction
Some drone cameras have a setting for automatic noise reduction, which will allow the camera to automatically sense noise in the image and apply its own corrective measures to minimize the noise or grain in the image.
Sometimes, this setting will create more noise in the image and reduce the quality of the final image as the camera tries to overcompensate for the conditions.
On some drones, the only way to switch off the automatic noise reduction setting is to change the sharpening feature to + 1. This will turn off the automatic noise reduction and preserve image clarity. Don’t turn the sharpness up too high because the camera processor is not very good at processing this function.
Compression Settings
Drone cameras use different codecs to compress the footage and images that the camera captures. The reason this is done is to minimize the file size of the image or footage that is stored in the internal storage or SD card of the camera.
The type of codec that is used is often denoted by the extension of the resulting image file. For example, a .MP4 file will have a different codec to a .MOV file.
If you are struggling with grainy footage, try a different codec, and the one we would recommend that gives the best overall option is the .MOV codec. Even though this is an Apple-based codec, most editing programs can interpret these files.
Digital Zoom
Digital zoom is significantly different from optical zoom. Optical zoom, in effect, changes the focal length of the lens of the camera. Digital zoom will zoom enlarge the digital image rather than change the magnification of the lens. As a result, digital zoom causes a loss of image quality and clarity.
Because drone cameras have small lenses, they have limited optical zoom features, and the zoom function will mostly be digital.
The only way to prevent this from being an issue is to use less digital zoom. The only way to use less digital zoom is to get closer to the image that you want to zoom in on.
Learn To Shoot In Manual Mode
When all the settings on the drone camera are left in automatic mode, the software in the camera will make the adjustments for you based on the information it receives from the sensor.
If you want to take exceptional footage, it would be in your best interests to learn how the manual settings on the camera work so that you can adjust the shutter speed, aperture, ISO, white balance, and other settings to get optimal quality.
It may seem a little daunting at first, but it won’t take long, and the improved results you will get in your videos and still images will make it well worth the effort.
Conclusion
Taking video footage and still, images is a natural progression to drone flying. It can become frustrating when the quality of the images is not what you expect or don’t compare well to the footage you have seen from other drone pilots.
Fortunately, you can improve the quality of the base footage that you capture with your drone by learning some entry-level photography principles.
Once you have the footage, it is also useful to have a good editing program that you can use to make the final tweaks and adjustments to the images. The onboard processor in the camera does not have the same capacity to edit images and produce a good quality final product as editing software does. If you are just starting out, you can learn the basics in our guide on how to edit drone footage.
Most of the drone footage that you see on the internet that makes you draw drop will have been processed in editing software.
You can check out some amazing drone footage in our list of best drone youtube channels. So, take your drone filming to the next level by learning how to adjust the camera settings and how to do post-shooting editing in a good editing package, and your footage will be providing the wow-factor in no time!
Once you really get the hang of taking incredible drone photos and videos, you can even build a business and get paid big money for it! Don’t believe me? Read our guide on how to start a drone photography business to see just how much your drone skills pay!
P.S. If you got 3+ hours to kill, you can watch this incredible compilation of drone footage. Absolutely awe inspiring!